1. Overview
This article will look at actuators in Spring Framework, most commonly used actuator end points and two ways to add application specific custom information to Spring boot’s info actuator endpoint.
2. About Spring Boot Actuators
Spring Boot’s built-in actuator endpoints allow developers and ops teams to monitor and interact with their applications (over HTTP or JMX).
Spring Boot includes over 20 built-in endpoints that are auto-configured if available. Just like the rest of the springboot features, actuators are a big productivity boost for development teams. In large and complex production systems with several microservices, the ability to monitor individual instances over a simple HTTP interface is a fundamental SRE need.
2.1 Health and Info Endpoints
Of the 20+ actuators, the two important and most commonly used endpoints are “health” and “info”.
The health endpoint surfaces information on the application’s health. Besides the overall application statuses "UP" and "DOWN", the health endpoint can surface information about data source status, disk/storage status, cache status, etc., using the various built-in contributors. It is always possible to add custom health contributors to report custom health metrics of the application’s individual custom components or capabilities. Detailed response structure for the health actuator is available as part of spring-boot docs here.
Info actuator exposes is an info endpoint to display application-specific information. It can surface application meta-data such as application name, version, build information, run time information such as environment variables as well as any other custom information. Let’s look at how to add custom information to the info actuator endpoint.
3. Adding custom information to info endpoint
In this article, we will build a sample rest service that echoes the input. After that, we will show health and info endpoints, and finally, we will add custom information to the info endpoints.
3.1 Create the empty project
We will first create a new Maven project from Spring Initializr
Select “Maven Project” as we will use Maven as the builder for this sample. From the “ADD DEPENDENCIES” section, search for “actuator” and add “Spring Boot Actuator” dependency. After that, we will also add a “Spring Web” dependency as we want to enable an embedded web server within our project. Then click “Generate” and download the demo.zip project package. Extract the project and import it to your favorite IDE as an existing Maven project.
The sample project adds “org.springframework.boot:spring-boot-starter-actuator” as a dependency and enables us to use “/info” endpoint.
You should see the following lines in the dependencies section in your pom.xml file:
<dependency>
    <groupId>org.springframework.boot</groupId>
    <artifactId>spring-boot-starter-actuator</artifactId>
</dependency>
<dependency>
    <groupId>org.springframework.boot</groupId>
    <artifactId>spring-boot-starter-web</artifactId>
</dependency>
3.2 Adding sample rest service
Let’s add a simple rest service using Spring @RestController and @GetMapping annotation. This service will echo the input sent by the caller.
@RestController
public class Echo {

    @GetMapping("/echo")
    public String echo(String input){
        return input;
    }
}
Now execute the spring-boot:run Maven goal to start the embedded Tomcat server. You will see that the server is started on port 8080 by default.
INFO 9900 --- [           main] o.s.b.w.embedded.tomcat.TomcatWebServer  : Tomcat started on port(s): 8080 (http) with context path ''
INFO 9900 --- [           main] c.t.a.ActuatorCustomInfoApplication      : Started ActuatorCustomInfoApplication in 2.207 seconds (JVM running for 2.564)
Now access http://localhost:8080/echo?input=HelloWorld from a browser, and you should see something like this:

3.3 Health endpoint
Access health actuator endpoint at http://localhost:8080/actuator/health. You should see the service status as ‘UP’.

3.4 Adding custom information to info endpoint
Similarly, access the info endpoint at http://localhost:8080/actuator/info

3.4.1 Using the application’s configuration
The actuator checks for the "info.*" properties. Add the following line to the application property file (application.properties or application.yml) and restart the application.
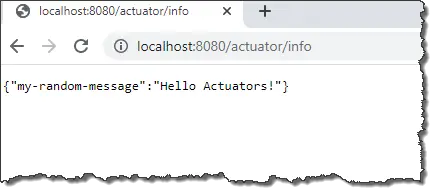
info.my-random-message=Hello Actuators!
At this point, your info endpoint URL should respond with the following:
3.4.2 Information groups
Now suppose we want to add some group of information to the endpoint. We will create the information group by using the property name prefix info.infogroup1.
info.infogroup1.morning=Good Morning!
info.infogroup1.night=Good Night!
This will result in the following response from the info endpoint:

3.4.3 Adding build information to info endpoint using spring boot maven plugin
In many projects, we want to add our project build information to our application. Spring enables us to add build information to the info endpoint.
If Spring Boot finds META-INF/build-info.properties file in our application’s classpath, the information in this file is used. With the Maven Spring Boot plugin (spring-boot-maven-plugin), we can generate the build-info.properties file by applying the "build-info" execution.
With this plugin, we can configure Spring Boot to generate project information used by the /info endpoint. To accomplish this, we will add the following statements inside the plugin definition.
<plugin>
    <groupId>org.springframework.boot</groupId>
    <artifactId>spring-boot-maven-plugin</artifactId>
    <executions>
        <execution>
            <id>build-info</id>
            <goals>
                <goal>build-info</goal>
            </goals>
        </execution>
    </executions>
</plugin>
Now when we access the info endpoint, we will see the following output.

Custom info in build information
To add some custom information to the build info, we will provide additional properties to the plugin configuration. You can add your custom key-value pairs or even use any property within the pom.xml. Here is an example where we add a custom "build_level.random_property" with some value and "java.version" derived from Maven pom.xml properties.
<execution>
    <id>build-info</id>
    ...
    <configuration>
        <additionalProperties>
            <!--  custom key-value info pairs-->
            <build_level.random_property>has a value</build_level.random_property>
            <!--  You can propagate any property from pom.xml-->
            <java.version>${java.version}</java.version>
        </additionalProperties>
    </configuration>
</execution>
When you check http://localhost:8080/actuator/info URL again, the output will be:
 You can check the generated build information from the target\classes\META-INF\build-info.properties file, which contains the source for this information.
4. Conclusion
This article looked at how springboot based application developers can surface static but important meta information about their applications over the info actuator endpoint. We looked at two ways to inject custom information into this actuator. 1 – adding properties under the info property group and 2 – using additional properties in the build-info plugin configuration